The Road to Hell is Paved With 3x5s


card-2


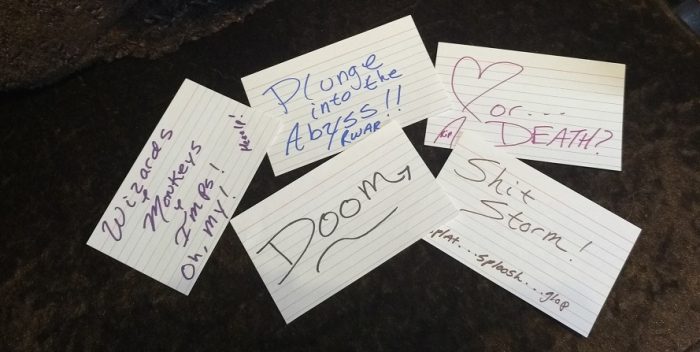
Hell for your characters that is 🙂

Those seemingly benign lined cards are a perfect tool of torment! Wield them right and the characters will writhe until the very end and with them the most precious of all tormentees – the reader.

Just how do you use these office supplies for creating doom? Why, any way that’s effective for you as an author. Here’s how I use them.

Once the main forces of my novel are set in my head and I have a solid grasp of the characters, plot and The End, I unsheath the Sharpies and haul out the cards. Then it’s time to plot out the gritty and the nitty for the battle plan! Each card represents a scene and each Sharpie color represents a character VP (View Point) so they can be easily tracked on the field. As scenes are written, it becomes clear which are essential, which can be combined and which are not necessary. There’s something strangely satisfying in wadding up a 3×5 whilst proclaiming “Haha! Your redundancy is futile!”

Then, I spread them out on the battle field, check for any gaps and create new scenes to strengthen the whole. This gives me a broad view to assess any weaknesses, where the story might lag, where it needs more speed, less speed, and balance the Force of tension and release.

Once their formation is complete and I’m satisfied with their placement it’s time to pile them up in order and take them to the computer. As powerful as 3x5s are they’re too small to contain exact marching orders, so these are plugged into the manuscript and include everything that the scene is supposed to accomplish – the emotions, the character innards and outters, foreshadows, clues, twists and troubles. As the scenes are briefed, they’re allotted into chapters.

And then…it’s time to write!

Let the games begin! Muahahahah!

Tree Pool Vivarium Build for Dragons! Pt. 2

Custom Foam Background


Now that the Great Stuff background is dried and cut – shown in the picture above – it’s time for the messiest and stinkiest part of the build, silicone and cocofiber/peat mix. I don’t have a picture of the actual process because once started it not only creates a ginormous mess but it also must be done swiftly or the fibers won’t stick.

For the organic material, a 60-80% peat – organic, with no fertilizers or additives in it, mixed with cocofiber gives the background a more natural look than cocofiber alone. It’s best to have more than enough mixed up because once this process starts it must continue! Or again, the fiber won’t stick right.

So, working one side at a time, using black silicone that does NOT have mold inhibitors in it (which are toxic to fish and reptiles) I worked in small segments from bottom to top to spread silicone over the foam and then took gobbing handfuls of the peat/coco mix and pressed it into the silicone. Once it dries for 1-2 hours, then the terrarium is flipped up and all the loose organic material is gently knocked off the wall. Then, it’s cleaned off the bottom and the process repeated for each side.

When it’s done it looks like this –

horned mountain dragon vivarium 1


Oh yeah, and the shoreline is Great Stuff’s Pond foam. It’s used in water areas as that’s what it’s meant for and black looks better uncovered than the cream colored regular stuff. The organic mix only covers the very top of the shoreline.

The next phase is the beginning of the fun part! Prepping to plant!

The land segment needs a drainage layer so the soil doesn’t get soggy and rot plant roots. Almost any non-toxic material can be used, rocks, lava rocks, clay balls etc. Charcoal that’s normally used in fish tanks helps keep undesirable odors out. Over that, place a layer of screening (not metal screening though) to keep the soil out of the drainage layer. Then it is time for…soil!

All my tanks are bio tanks – basically mini eco systems within glass. Depending on what plants are going in the percentage varies but the ingredients are mostly the same – organic garden soil, peat moss, cocofiber, leaf mold and leaf litter, bits of sheet moss, tiny rocks, sand, tiny bits of aspen and/or hardwood bark, aquarium charcoal. This is placed on top of the screen. After the planting process, wet moss and then a layer of leaf litter is added on top of the soil. After all that is in, the clean up crew is added.

Vivarium Planting 1


As you can see, a bare vivarium drives me wonky so there’s some plants in there to green it up until the final and most intriguing stage – planting!

The little squid like plant on the side is an airplant – Josh’s Frogs is the best place to get them. They’re easy to attach with silicone and toothpicks to support the weight until the silicone dries. They don’t like constant humidity, so keeping them near the slit in the door or up by the screen top keeps them happy even in tank that is else wise humid.

Attaching Air Plant


Coming soon – Tree Pool Vivarium Build for Dragons! Pt. 3


3 Tips to Picking the Perfect Agent

1281079_68830977


So, your manuscript is spit-shined, polished, gleaming, ready to be presented to agents. But, where should you send it? Why, to the right agent of course! Finding this special someone who’ll love your brain child and stand beside you, cutting through the red-tape infested world of publishing isn’t difficult it just takes a tad of time, just like finding the right anything.

Here’s three tips that’ll help you start your journey to discovering the perfect agent for you.

1.) Don’t use a 3rd party to submit. To date, I’ve never heard an agent say “Wow! A 3rd party submission! I feel so special and so confident that the writer submitting did their research!” And it’s unlikely they will ever utter those words. The writer/agent relationship is supposed to be a long-term thing that takes thought, research, personal choices that only the author/agent can make on their own and a magic clicky juju that generates when two minds are in sync. Kinda like the Vulcan mind meld.

2.) Research. Not just on Writer’s Market or Publisher’s Market Place, nope, though useful tools to finding general info you want to dig deeper. Utilize that ever-so-powerful oracle of Google. Read articles about the agent, interviews, everything you possibly can to make sure that they’ll be a great fit. Why when WM lists what they like all in one page? Because an agent might list Fantasy as a genre of interest but what they might really want is only selective types of Fantasy. Some like high, others low, some like epic some romantic, and so on down the various flavors within any given genre. Knowing an agent’s specific tastes will save both of you time and frustration.

3.) Stalk them. Not in real life, that’ll end with a restraining order or death depending on the agent’s mood. However, stalking on Twitter, Facebook or wherever the agent is most active is an acceptable method of getting to know them. This clues you in to the agent’s current MSWL (aka Manuscript Wish List, search it on Twitter) and some agents post spiffy things like tenqueries or even 500queries where they post what sort of query they received, their general thoughts on it and whether they passed or requested – valuable insights to be had! It’s also a window into their personality, which is important because, as stated in #1, the author/agent relationship is long-term and you must have confidence that you can work with this person through the hills and valleys of the publishing world.

Wishing you the best of luck out there! And remember, the old adage is true – having a bad agent is worse than having no agent so take your time and know who you’re signing with.

Tree Pool Vivarium Build for Dragons! Pt. 1

This is a cool little build using an Exo Terra 18x18x24 glass terrarium. I designed this to temporarily house two baby mountain horned dragons (they’re soooo adorable!) until they grow another few inches. But I also needed to make the design fluid, so when the dragons outgrow this set up, it can easily be tweaked to accommodate poison dart frogs.

Since both species need water and running water is the best, I started with the waterfall and pool area.

IMG_20160410_165259_347


To the left is the land area, to the right is the pool with the fall. To separate the two areas, so the water doesn’t flood the land and create a wretched bog, I cut plexiglass to size, heated it with a heat gun and bent it to make a more natural shoreline. With the shoreline done, I set it in place, marked where it’d sit with a marker and then siliconed the daylights out of it. In this area, it’s better to over-do the silicone than under do it. Ripping up a landscaped area to seal leaks later is a royal pain.

Next, I used egg crate and created a boxed in area to house the pump and hose that’s also large enough for me to reach in there and do maintenance. As a preventative measure, I also siliconed screening to the portion that’ll be submerged to keep debris from entering the pump area and causing cloggage.

Those marks you see on the glass are for where the cork will go. I spent days arranging and re-arranging the wood pieces until I found a combination that I liked.

IMG_20160411_143805_648


Here’s the cork bark in situ. The cork tube is temporarily held in place by unused paint stirring sticks. Once the Great Stuff is dry the tube will be secure.

IMG_20160411_143758_119


Before setting the main cork in place, I drilled a hole for the waterfall tubing, then snugged and siliconed a piece of pvc into the hole to hold the tubing.

IMG_20160413_190738_375


And then…the foaming begins! I prefer Great Stuff’s Gap and Cracks for most work, other than shorelines and filling tubes, because it dries hard and solid. The Windows and Doors dries soft, which might be okay for frogs but not for the claws of dragons. It’s also not solid enough to hold the weight of heavy woods. But I did cap the cork tube with the Great Stuff Windows and Doors to prevent access. I also used Windows and Doors behind the cork on the waterfall to avoid over-expansion.

IMG_20160411_144851_277


Working on one side at a time, I foamed in the pieces and waited at least 6 hours per side for the foam to set enough before flipping the terrarium to work on another side.

IMG_20160413_191643_354


Once the foam dried completely, the carving process began. Carving the foam gives a more realistic look and allows silicone and the cocofiber/peat mixture to stick better. For carving I usually use a serrated steak knife, sometimes pumpkin carvers too and razor blades.

Stay tuned for Tree Pool Terrarium Build Pt. 2!