How to Make Free to Low Cost Shrimp Hides

Dwarf shrimp are adorable, easy to care for aquatics. But if you’re like me and simply can’t abide a single species tank – they need places to hide if you want them to propagate. Even supposedly shrimp-safe fish, like the peaceful micro rasboras and the weensy dwarf amber barb, will eat shrimplets. Though tangles of driftwood and tumbles of rock will help, the more hides the better.

But, the price tags on shrimp hides is appalling! Ack.

So here’s some free or low-cost alternatives.

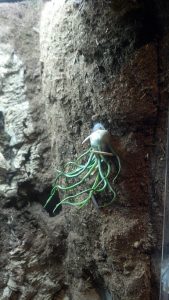
If you’re into dwarf shrimp, chances are you have one (or several!) planted tanks. Know those small, black baskets that come with aquatic plants? They make awesome hides! And they’re free.


You can stick them in the substrate as-is, or weave moss through the slits to create a moss top, like I did here with strands of phoenix moss.


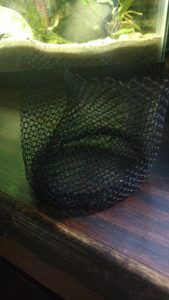
If moss isn’t your gig, scraps of non-metal screen attached with aquarium safe silicone works well too. One of our lawn chairs broke, so I cut out the mesh cup holder and used that. 100% free hides!


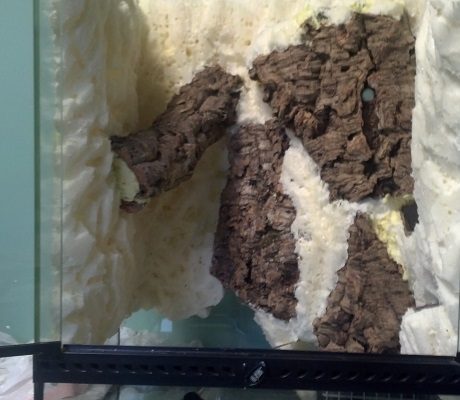
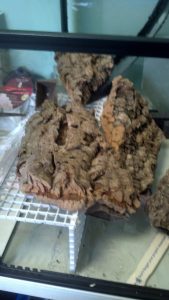
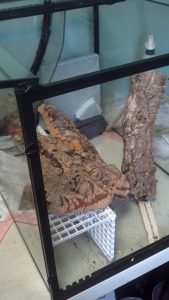
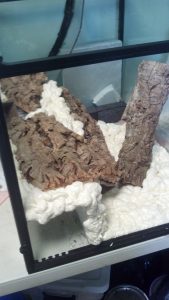
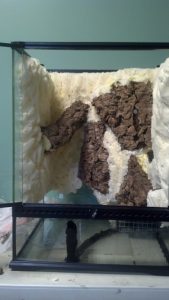
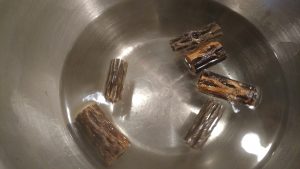
Another inexpensive solution that also conditions your water is cholla. I like to get them in lengths and then scare the crap out of everyone by using power tools to cut them into pieces.


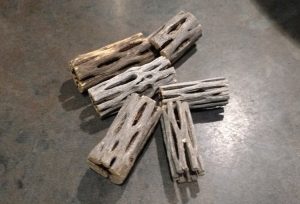
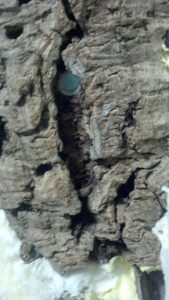
After cutting, stick them in a bowl, pour boiling water on them, and then wait until they expand bit and sink (usually within 24-hours). Even expanded, their holes are so thin that only the most determined of fish could reach your shrimplets.


Other free to low cost alternatives are:

  • Pieces of broken clay pots (no sharp edges)
  • PVC scraps
  • Tiny planters (the kind tiny terrarium plants come in)
  • Tiny Tupperware

Or any other aquarium safe material you have on hand that can provide cover for your shrimp. Get creative and alternatives will abound.

Happy tanking!

Tree Pool Vivarium Build for Dragons! Pt. 2

Custom Foam Background


Now that the Great Stuff background is dried and cut – shown in the picture above – it’s time for the messiest and stinkiest part of the build, silicone and cocofiber/peat mix. I don’t have a picture of the actual process because once started it not only creates a ginormous mess but it also must be done swiftly or the fibers won’t stick.

For the organic material, a 60-80% peat – organic, with no fertilizers or additives in it, mixed with cocofiber gives the background a more natural look than cocofiber alone. It’s best to have more than enough mixed up because once this process starts it must continue! Or again, the fiber won’t stick right.

So, working one side at a time, using black silicone that does NOT have mold inhibitors in it (which are toxic to fish and reptiles) I worked in small segments from bottom to top to spread silicone over the foam and then took gobbing handfuls of the peat/coco mix and pressed it into the silicone. Once it dries for 1-2 hours, then the terrarium is flipped up and all the loose organic material is gently knocked off the wall. Then, it’s cleaned off the bottom and the process repeated for each side.

When it’s done it looks like this –

horned mountain dragon vivarium 1


Oh yeah, and the shoreline is Great Stuff’s Pond foam. It’s used in water areas as that’s what it’s meant for and black looks better uncovered than the cream colored regular stuff. The organic mix only covers the very top of the shoreline.

The next phase is the beginning of the fun part! Prepping to plant!

The land segment needs a drainage layer so the soil doesn’t get soggy and rot plant roots. Almost any non-toxic material can be used, rocks, lava rocks, clay balls etc. Charcoal that’s normally used in fish tanks helps keep undesirable odors out. Over that, place a layer of screening (not metal screening though) to keep the soil out of the drainage layer. Then it is time for…soil!

All my tanks are bio tanks – basically mini eco systems within glass. Depending on what plants are going in the percentage varies but the ingredients are mostly the same – organic garden soil, peat moss, cocofiber, leaf mold and leaf litter, bits of sheet moss, tiny rocks, sand, tiny bits of aspen and/or hardwood bark, aquarium charcoal. This is placed on top of the screen. After the planting process, wet moss and then a layer of leaf litter is added on top of the soil. After all that is in, the clean up crew is added.

Vivarium Planting 1


As you can see, a bare vivarium drives me wonky so there’s some plants in there to green it up until the final and most intriguing stage – planting!

The little squid like plant on the side is an airplant – Josh’s Frogs is the best place to get them. They’re easy to attach with silicone and toothpicks to support the weight until the silicone dries. They don’t like constant humidity, so keeping them near the slit in the door or up by the screen top keeps them happy even in tank that is else wise humid.

Attaching Air Plant


Coming soon – Tree Pool Vivarium Build for Dragons! Pt. 3


Tree Pool Vivarium Build for Dragons! Pt. 1

This is a cool little build using an Exo Terra 18x18x24 glass terrarium. I designed this to temporarily house two baby mountain horned dragons (they’re soooo adorable!) until they grow another few inches. But I also needed to make the design fluid, so when the dragons outgrow this set up, it can easily be tweaked to accommodate poison dart frogs.

Since both species need water and running water is the best, I started with the waterfall and pool area.

IMG_20160410_165259_347


To the left is the land area, to the right is the pool with the fall. To separate the two areas, so the water doesn’t flood the land and create a wretched bog, I cut plexiglass to size, heated it with a heat gun and bent it to make a more natural shoreline. With the shoreline done, I set it in place, marked where it’d sit with a marker and then siliconed the daylights out of it. In this area, it’s better to over-do the silicone than under do it. Ripping up a landscaped area to seal leaks later is a royal pain.

Next, I used egg crate and created a boxed in area to house the pump and hose that’s also large enough for me to reach in there and do maintenance. As a preventative measure, I also siliconed screening to the portion that’ll be submerged to keep debris from entering the pump area and causing cloggage.

Those marks you see on the glass are for where the cork will go. I spent days arranging and re-arranging the wood pieces until I found a combination that I liked.

IMG_20160411_143805_648


Here’s the cork bark in situ. The cork tube is temporarily held in place by unused paint stirring sticks. Once the Great Stuff is dry the tube will be secure.

IMG_20160411_143758_119


Before setting the main cork in place, I drilled a hole for the waterfall tubing, then snugged and siliconed a piece of pvc into the hole to hold the tubing.

IMG_20160413_190738_375


And then…the foaming begins! I prefer Great Stuff’s Gap and Cracks for most work, other than shorelines and filling tubes, because it dries hard and solid. The Windows and Doors dries soft, which might be okay for frogs but not for the claws of dragons. It’s also not solid enough to hold the weight of heavy woods. But I did cap the cork tube with the Great Stuff Windows and Doors to prevent access. I also used Windows and Doors behind the cork on the waterfall to avoid over-expansion.

IMG_20160411_144851_277


Working on one side at a time, I foamed in the pieces and waited at least 6 hours per side for the foam to set enough before flipping the terrarium to work on another side.

IMG_20160413_191643_354


Once the foam dried completely, the carving process began. Carving the foam gives a more realistic look and allows silicone and the cocofiber/peat mixture to stick better. For carving I usually use a serrated steak knife, sometimes pumpkin carvers too and razor blades.

Stay tuned for Tree Pool Terrarium Build Pt. 2!